Indian Vehicles Simulator 3D Controls & Buttons Guide
Time Required: 3 to 5 Minutes | Platform: Android | Last Verified: September 2026
Written by David Kalin, Gaming & SEO Expert with 5+ years covering mobile games. This is an independent fan resource and is not affiliated with, endorsed by, or operated by AN Gaming Studio.
New to Indian Vehicles Simulator 3D and not sure what half the on-screen buttons actually do? You’re not alone, the default layout packs a lot into a small screen, and it’s not always obvious at a glance. Here’s what everything does, and how to switch to a different control scheme if the default doesn’t feel right for you.
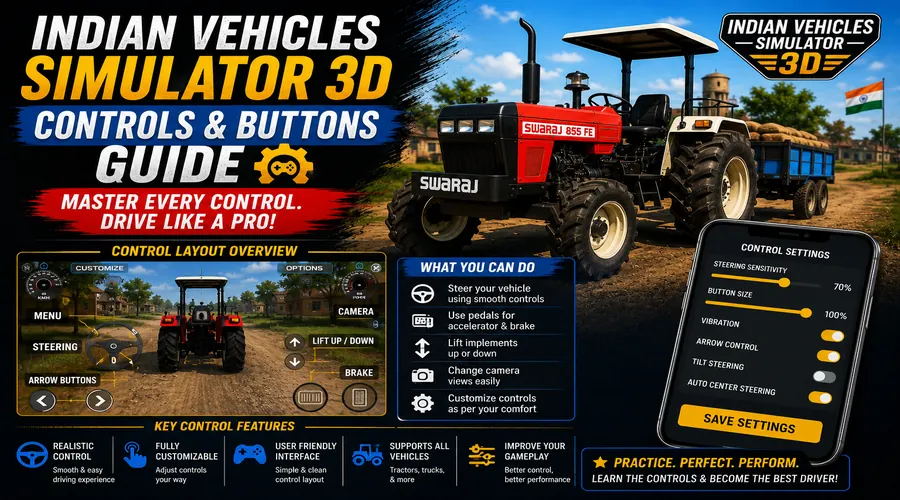
Indian Vehicles Simulator 3D uses on-screen steering buttons on the left and acceleration, brake, and reverse buttons on the right by default, with the option to switch to accelerometer, steering wheel, or joystick controls under the Options menu.
What You Need to Know First
The control layout is split by design, not by accident. Steering lives on the left side of the screen, acceleration and braking live on the right, this keeps your thumbs in fixed, predictable positions instead of forcing you to hunt for buttons mid-drive. This same layout carries across every vehicle type, cars, bikes, tractors, trucks, and even the helicopter and airplane, so once you learn it, it applies everywhere.
You are not locked into this default layout. The Options menu gives you three alternative ways to control steering specifically: accelerometer (tilting your device), a virtual steering wheel, or a joystick. Acceleration, braking, and reverse stay button-based regardless of which steering method you pick.
What Each Button Does
On the left side, the steering buttons let you turn left and right, this is the default and most direct way to control direction, no calibration or setup needed. On the right side, you’ll find separate buttons for accelerate, brake, and reverse, positioned so you can reach all three without shifting your hand grip.
Beyond the core driving buttons, the HUD includes a speedometer, an RPM-style gauge visible during Tochan Mode pulls, a Customize button, and an Options button. Camera angle is adjustable separately from the driving controls, useful for getting a wider view while flying the helicopter or airplane, or a tighter view when navigating tricky off-road terrain. Headlights, horn, and similar minor functions are typically accessed as smaller buttons near the main control cluster rather than taking up primary screen space.
Step by Step: Switching Control Schemes
- Tap the Options button from the main driving screen.
- Look for the controller or control scheme setting.
- Choose between the default on-screen buttons, accelerometer, steering wheel, or joystick.
- Confirm your selection and return to driving.
- Test the new control scheme in an open area before relying on it for something precise like Tochan Mode or tight off-road terrain.
If accelerometer controls feel too sensitive or not sensitive enough, that’s a common first impression, give it a few minutes of driving before deciding it’s not for you, since tilt-based steering takes more adjustment than button or joystick controls typically do. If the controls stop responding altogether rather than just feeling off, that’s usually not a settings issue, our Not Working guide covers that separately.
Common Mistakes to Avoid
Don’t switch control schemes mid-Tochan Mode pull or mid-flight if you can avoid it, changing your steering method while you’re mid-action is disorienting and easy to mistime. If you’re using accelerometer controls, don’t hold your device at an awkward angle and then wonder why steering feels off, the accelerometer reads your device’s actual tilt, so your resting hold position matters.
Don’t assume every vehicle handles identically just because the button layout is the same. A tractor and a bike respond differently to the same input, heavier vehicles like tractors and trucks turn and brake more gradually than a car or bike does, that’s expected vehicle physics, not a controls problem. Once you’ve got a control setup you like, make sure it sticks, our Save Data Backup guide covers keeping your progress and settings safe.
Frequently Asked Questions
Q: What are the default controls in Indian Vehicles Simulator 3D?
Steering buttons on the left, and accelerate, brake, and reverse buttons on the right, this is the default layout across every vehicle type in the game.
Q: How do I switch to accelerometer, steering wheel, or joystick controls?
Open the Options menu from the driving screen and look for the controller setting, all three alternative steering methods are available there alongside the default on-screen buttons.
Q: Which control scheme is best?
This comes down to personal preference, on-screen buttons are the most immediate with no adjustment period, accelerometer feels more natural to some players once they get used to it, and steering wheel or joystick controls suit players who want a more traditional feel.
Q: Do controls work differently for the helicopter and airplane?
The same core layout applies, steering on the left, throttle-related controls on the right, though flying naturally involves more use of the camera angle adjustment than ground vehicles typically need.
Q: Why does my vehicle feel hard to control?
This is usually vehicle physics rather than a controls issue, heavier vehicles like tractors and trucks turn and brake more gradually than cars or bikes by design, try a lighter vehicle first if you want more responsive handling.
Final Tips
Stick with the default on-screen buttons for your first few sessions before experimenting with accelerometer, wheel, or joystick controls, it’s easier to judge whether an alternative scheme actually suits you once you already know how the game is supposed to feel. If you’re heading into Tochan Mode for the first time, our homepage covers how that mode actually works before you commit to a control scheme for it specifically.